Import and Export Gitlab Projects Effectively
This guide demonstrates how to easily import and export projects and groups within GitLab, discusses essentials, such as permissions and email notifications, and walks you through each export and import step.
Prerequisites
- A GitLab account with Owner permissions for the project or group you wish to import/export
- An email account linked to your GitLab account for receiving notifications
Exporting in GitLab
Group Export
Steps
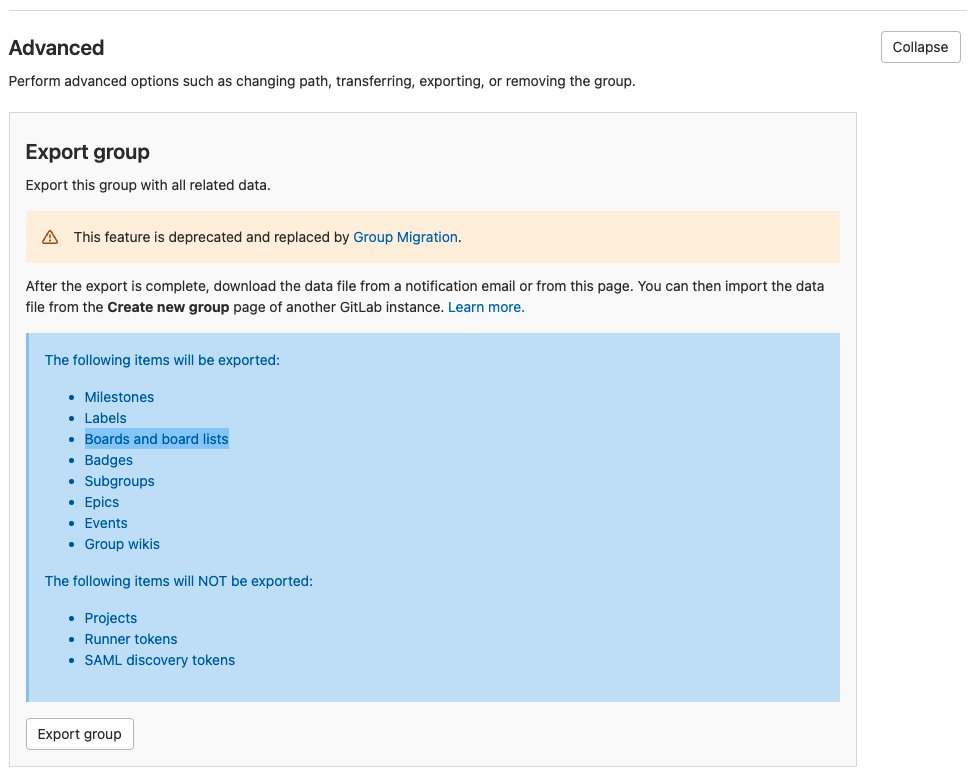
Log In: Access GitLab using an account that holds Owner permissions for the group you want to export.
Navigate to Group: Go to
Menu > Groupsand select the group you wish to export.Access Settings: From the left sidebar, navigate to
Settings > General.Start Export: In the "Advanced" section, click
Export Group.- Note: If an export already exists, the button will say
Regenerate export. - Caution: You will receive a warning that export is deprecated in favor of migration between GitLab instances. Proceed, since the goal is to export to a file.

- Note: If an export already exists, the button will say
Wait: An export process will begin, and you will receive an email upon its completion.
Download Export:
a. Use the link in the email. Copying/pasting is likely required.
b. Alternatively, refresh
Settings > General, expand theAdvancedsection, and clickDownload export.
Possible Issues
If the export process takes too long, contact your GitLab administrator for assistance.
Project Export
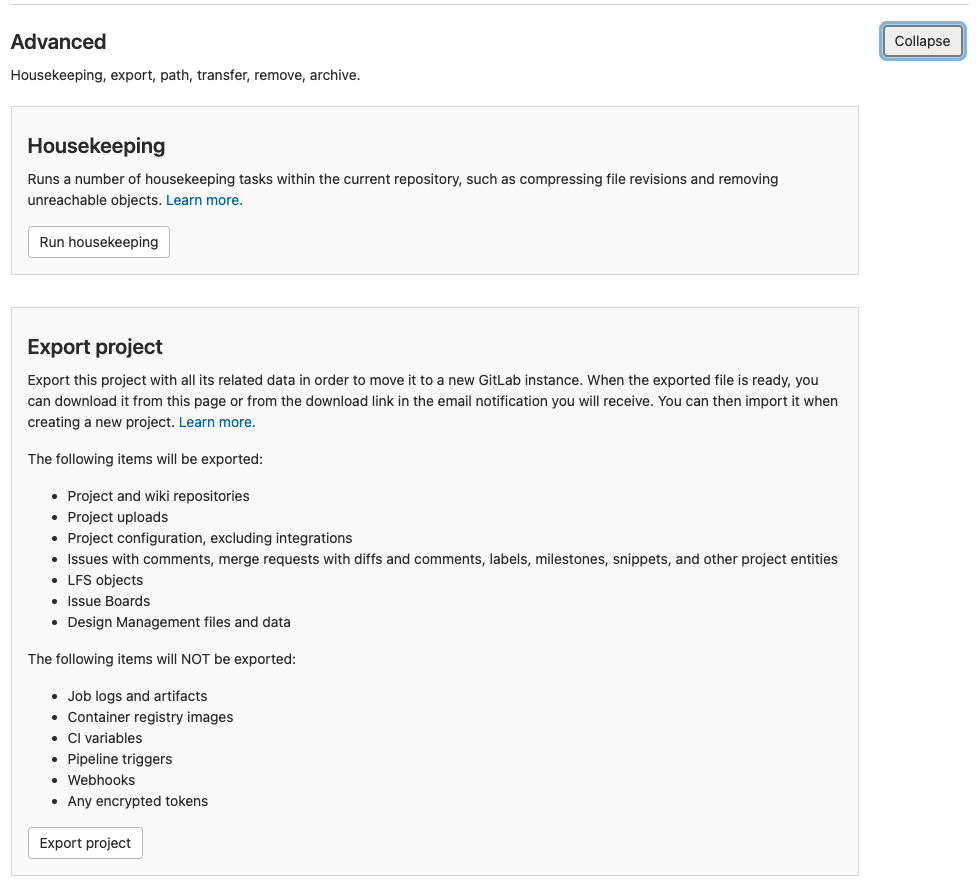
Repeat the same steps as for Group Export, but navigate to Menu > Projects in step 2 and select your project.

Bare Clone
Generate Access Token: If you have not already, generate an access token for your user account. Only
read_repositorypermissions are required.Get HTTPS URL: Navigate to your project, click
Clone, and copy theClone with HTTPSURL.Execute Clone: Run the following command, replacing the URL, as necessary.
git clone --bare <your-https-url>Authentication: If prompted, input your username and generated access token.
Create Archive:
tar -czf your-archive-name.tar.gz your-bare-repo.git
Importing in GitLab
Group Import
Log In: Access GitLab with an account that holds Owner permissions.
Start Import: Click
Groupsat the top right, thenImport group.Configure: Fill out the group name and modify the URL, as needed.
Upload File: Click
Choose file...and upload the previously exported file.Confirm: Click
Import. The process may take a while, and you can refresh the page to check progress.Completion: Your group should now be imported.
Project Import
Follow the steps outlined in Group Import, but go to Projects > Import project instead of Import group for starting the import.
Validation
To ensure the export and import were successful:
- Verify that all the project or group files, issues, and members were transferred.
- Make sure to check your email for notifications confirming a successful process.