Set Up Single Sign-On (SSO) for Atlassian Products
This guide provides step-by-step instructions for setting up single sign-on (SSO) on Atlassian products, such as Jira and Confluence, using miniOrange and Keycloak.
These steps are adapted from The Big Bang Documentation.
Prerequisites
- Make sure you have an instance of the Atlassian application (app) (either Confluence or Jira) up and running.
- Do not log into the Atlassian app until instructed in the following steps.
Initial Setup in Atlassian App (Confluence/Jira)
Log In as Administrator User
- Navigate to your Atlassian app (Confluence/Jira) and log in as the administrator (admin) user.
- Complete the initial settings as prompted. Select "Start with a blank project", if unsure.
Navigate to Manage Apps
- Click on the Settings gear icon in the top-right corner.
- Select Manage Apps. Note: For Jira, also click Manage Apps on the left side.
Adjust Settings
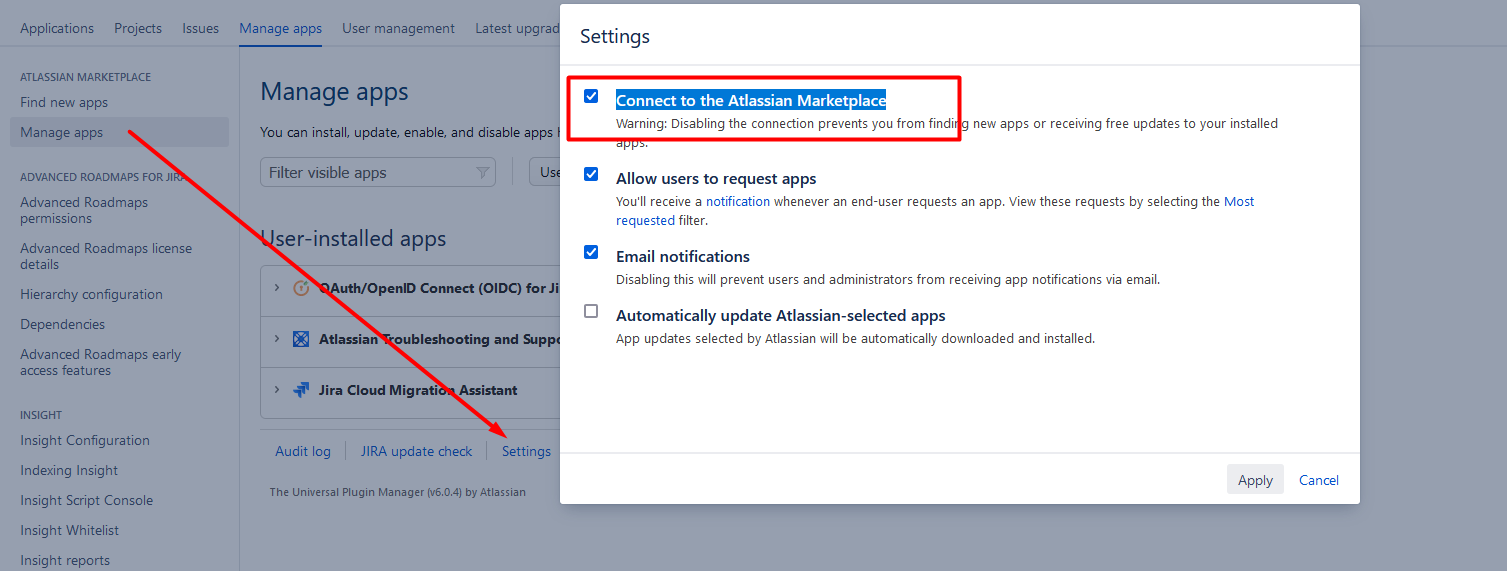
- Scroll to the bottom, and click Settings.
- Uncheck Connect to the Atlassian Marketplace, and click Apply.
Upload miniOrange SSO App
Click Upload app.
Navigate to and select the miniOrange SSO app suitable for your installation. Download links:
a. For Jira
Note: Ensure the miniOrange app files are uploaded to an S3 bucket as part of your data transfer.
Activate License
Paste your valid miniOrange SSO app license key, and click Update.
Keycloak Configuration
Navigate to Keycloak and Select Realm
- Log in to Keycloak as an admin user.
- Make sure to select the appropriate realm.
Create User Groups
- Navigate to Groups under Manage on the left menu.
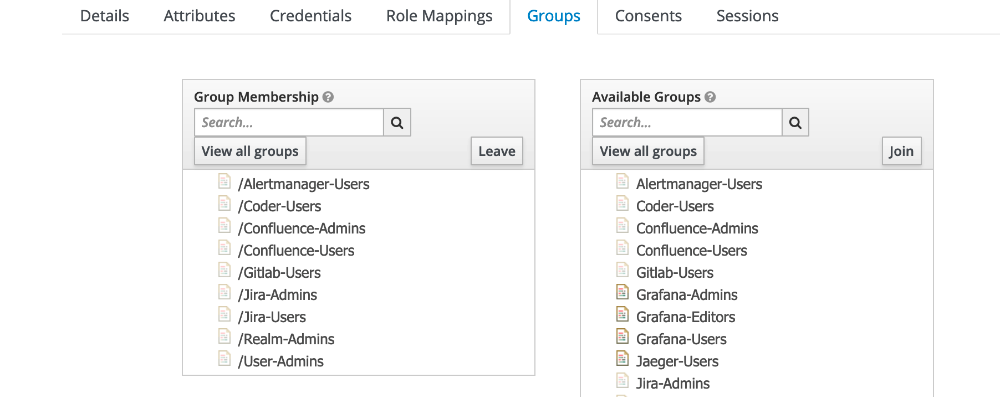
- Create the following groups:
Jira-Users,Jira-Admins,Confluence-Users,Confluence-Admins.
Assign Users to Groups
Any user designated as an admin, must belong to both the Admins and Users groups for the specific application.
Export Groups and Obtain IDs
- Export groups and roles to a JSON file.
- Open the JSON file and obtain the IDs for
Jira-UsersandConfluence-Users.
Create OpenID Connect Clients
- Navigate to Clients, and click Create.
- For Client ID, use the pattern
structsure_{{ id }}_{{ application_name }}(replace{{ id }}and{{ application_name }}accordingly). - Choose openid-connect as the client protocol.
- Click Save.
Additional Client Settings
- Change Access type to Confidential.
- Enter the valid redirect URL as indicated in the miniOrange plugin (found under the Configure button).
- Save your changes in Keycloak.
Example Redirect URLs:
- Confluence:
https://confluence.example.com/plugins/servlet/oauth/callback- Jira:
https://jira.example.com/plugins/servlet/oauth/callback
Configure Attribute Mappers
Navigate to Clients, then go to the Mappers tab.
Add built-in attribute mappers based on the application:
a. For Jira:
family name,email,username,full nameb. For Confluence:
email,full nameAdd a custom "groups" mapper (see more details below).
Get Client Secret
- Navigate to Clients, select your Client ID, and click the Credentials tab.
- Note down the 'Secret' for the next steps.
Final Configuration in Atlassian App (Confluence/Jira)
Configure OAuth in miniOrange Plugin
Navigate to the miniOrange plugin in your Atlassian app.
Go to the Configure OAuth tab.
Select Keycloak in the application drop-down menu.
Enter the following details:
a. Client ID (from Keycloak)
b. Client Secret (from Keycloak)
c. Hostname (e.g.,
https://sso.example.com)d. Realm name (e.g.,
example-realm)Under Advanced Settings, select JWKS EndPoint URL, and enter the appropriate URL.
Map User Attributes
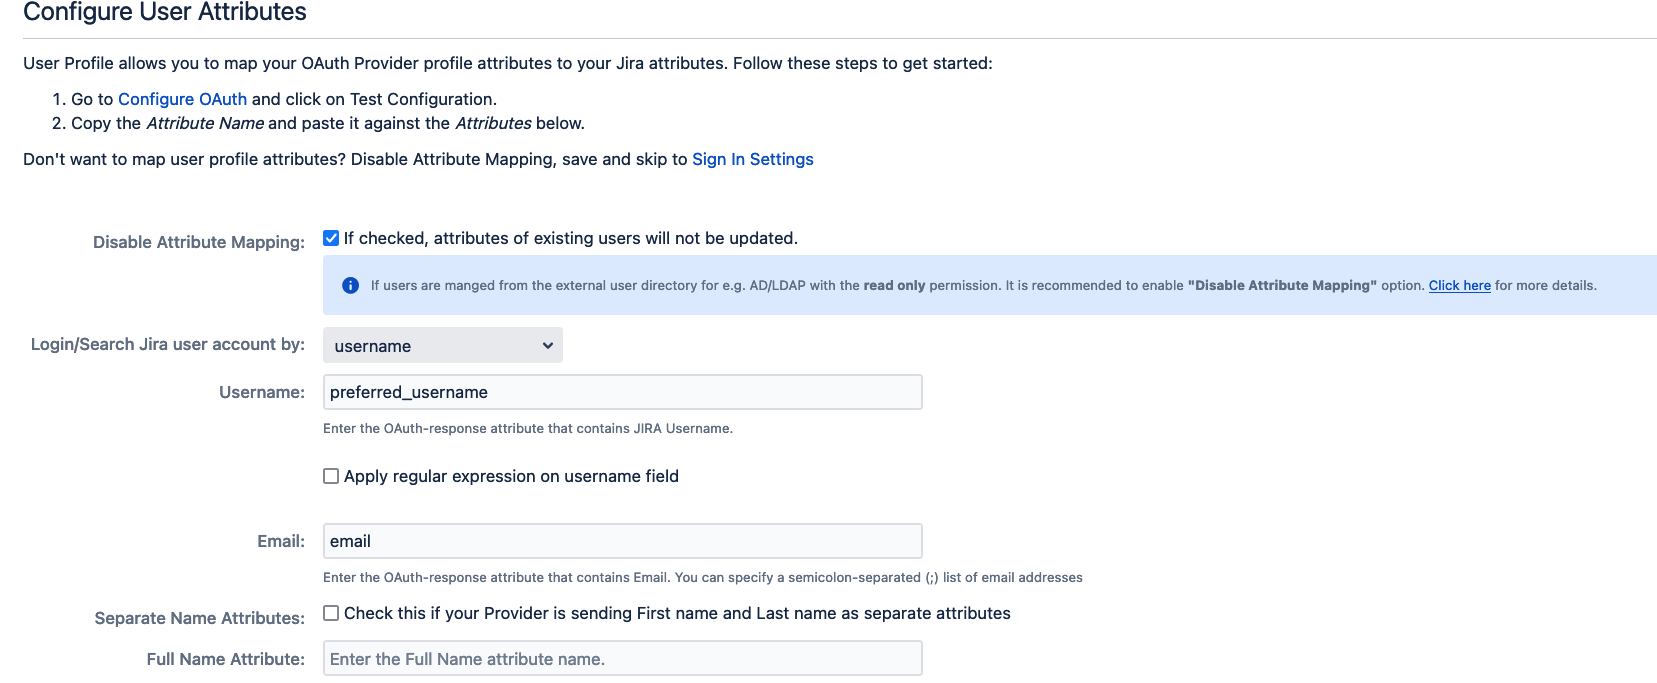
Go to the User Profile tab.
Configure user mapping as follows:
a. Username:
preferred_usernameb. Email:
email
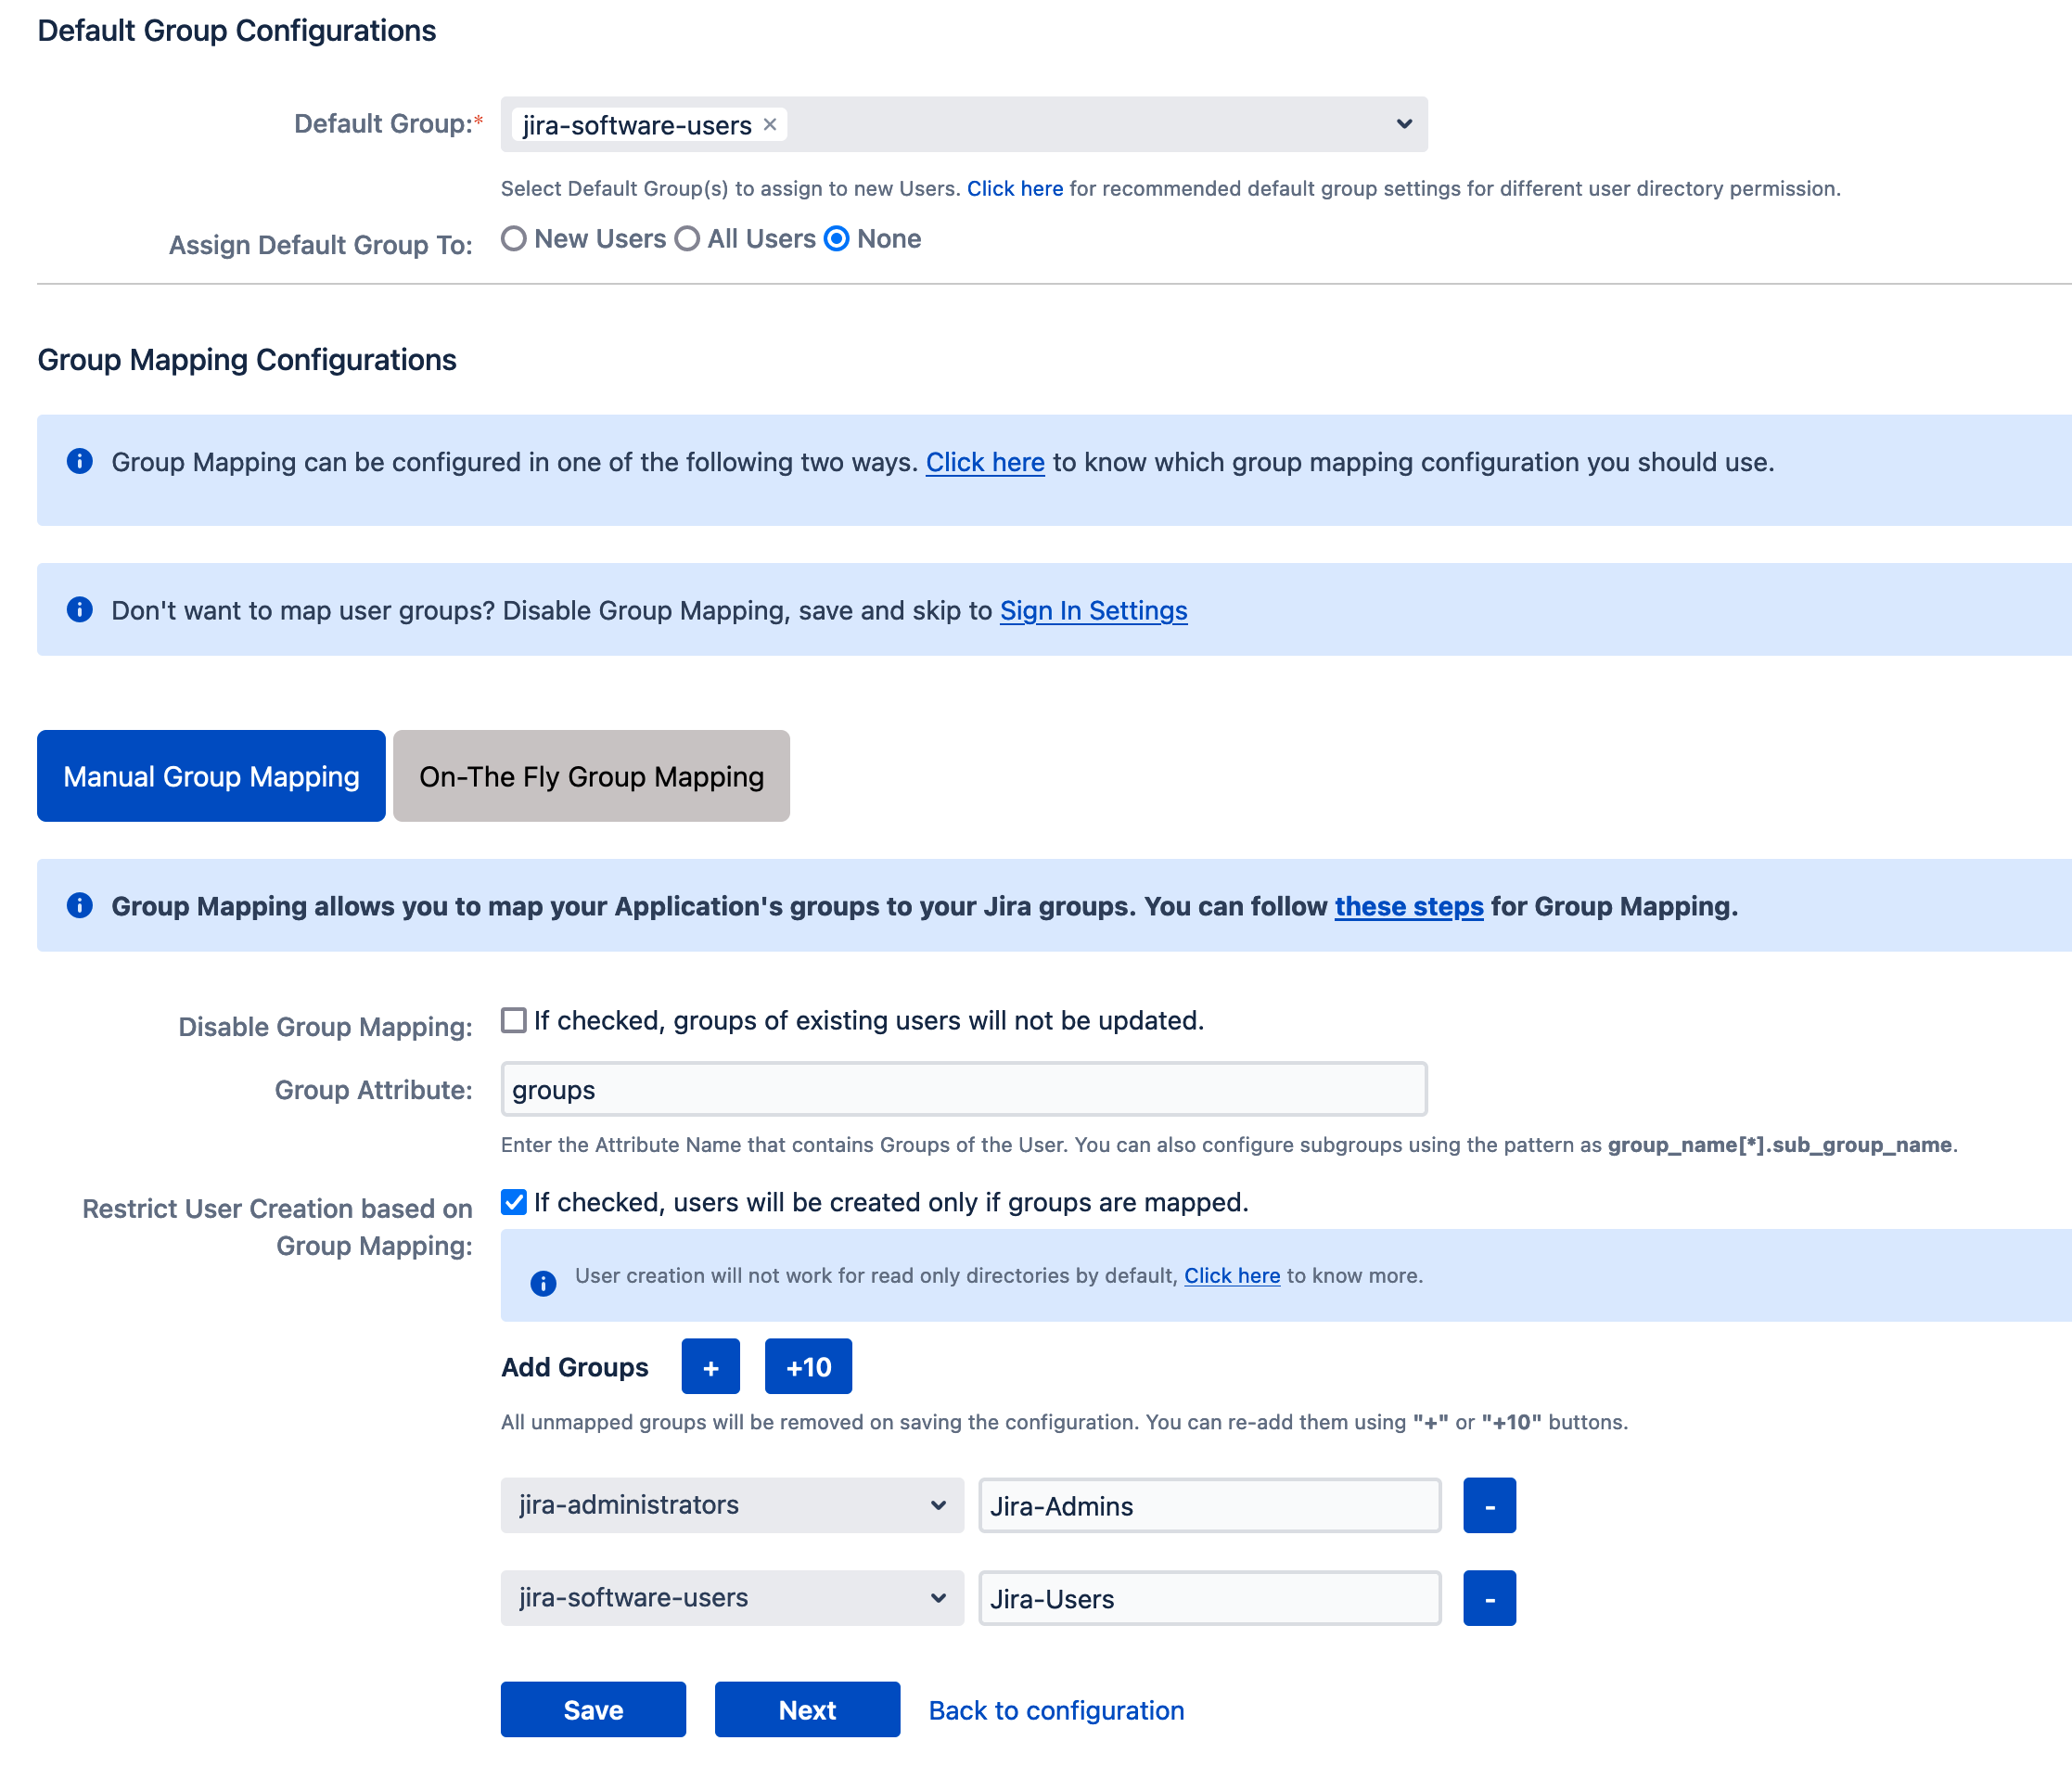
Configure User Groups
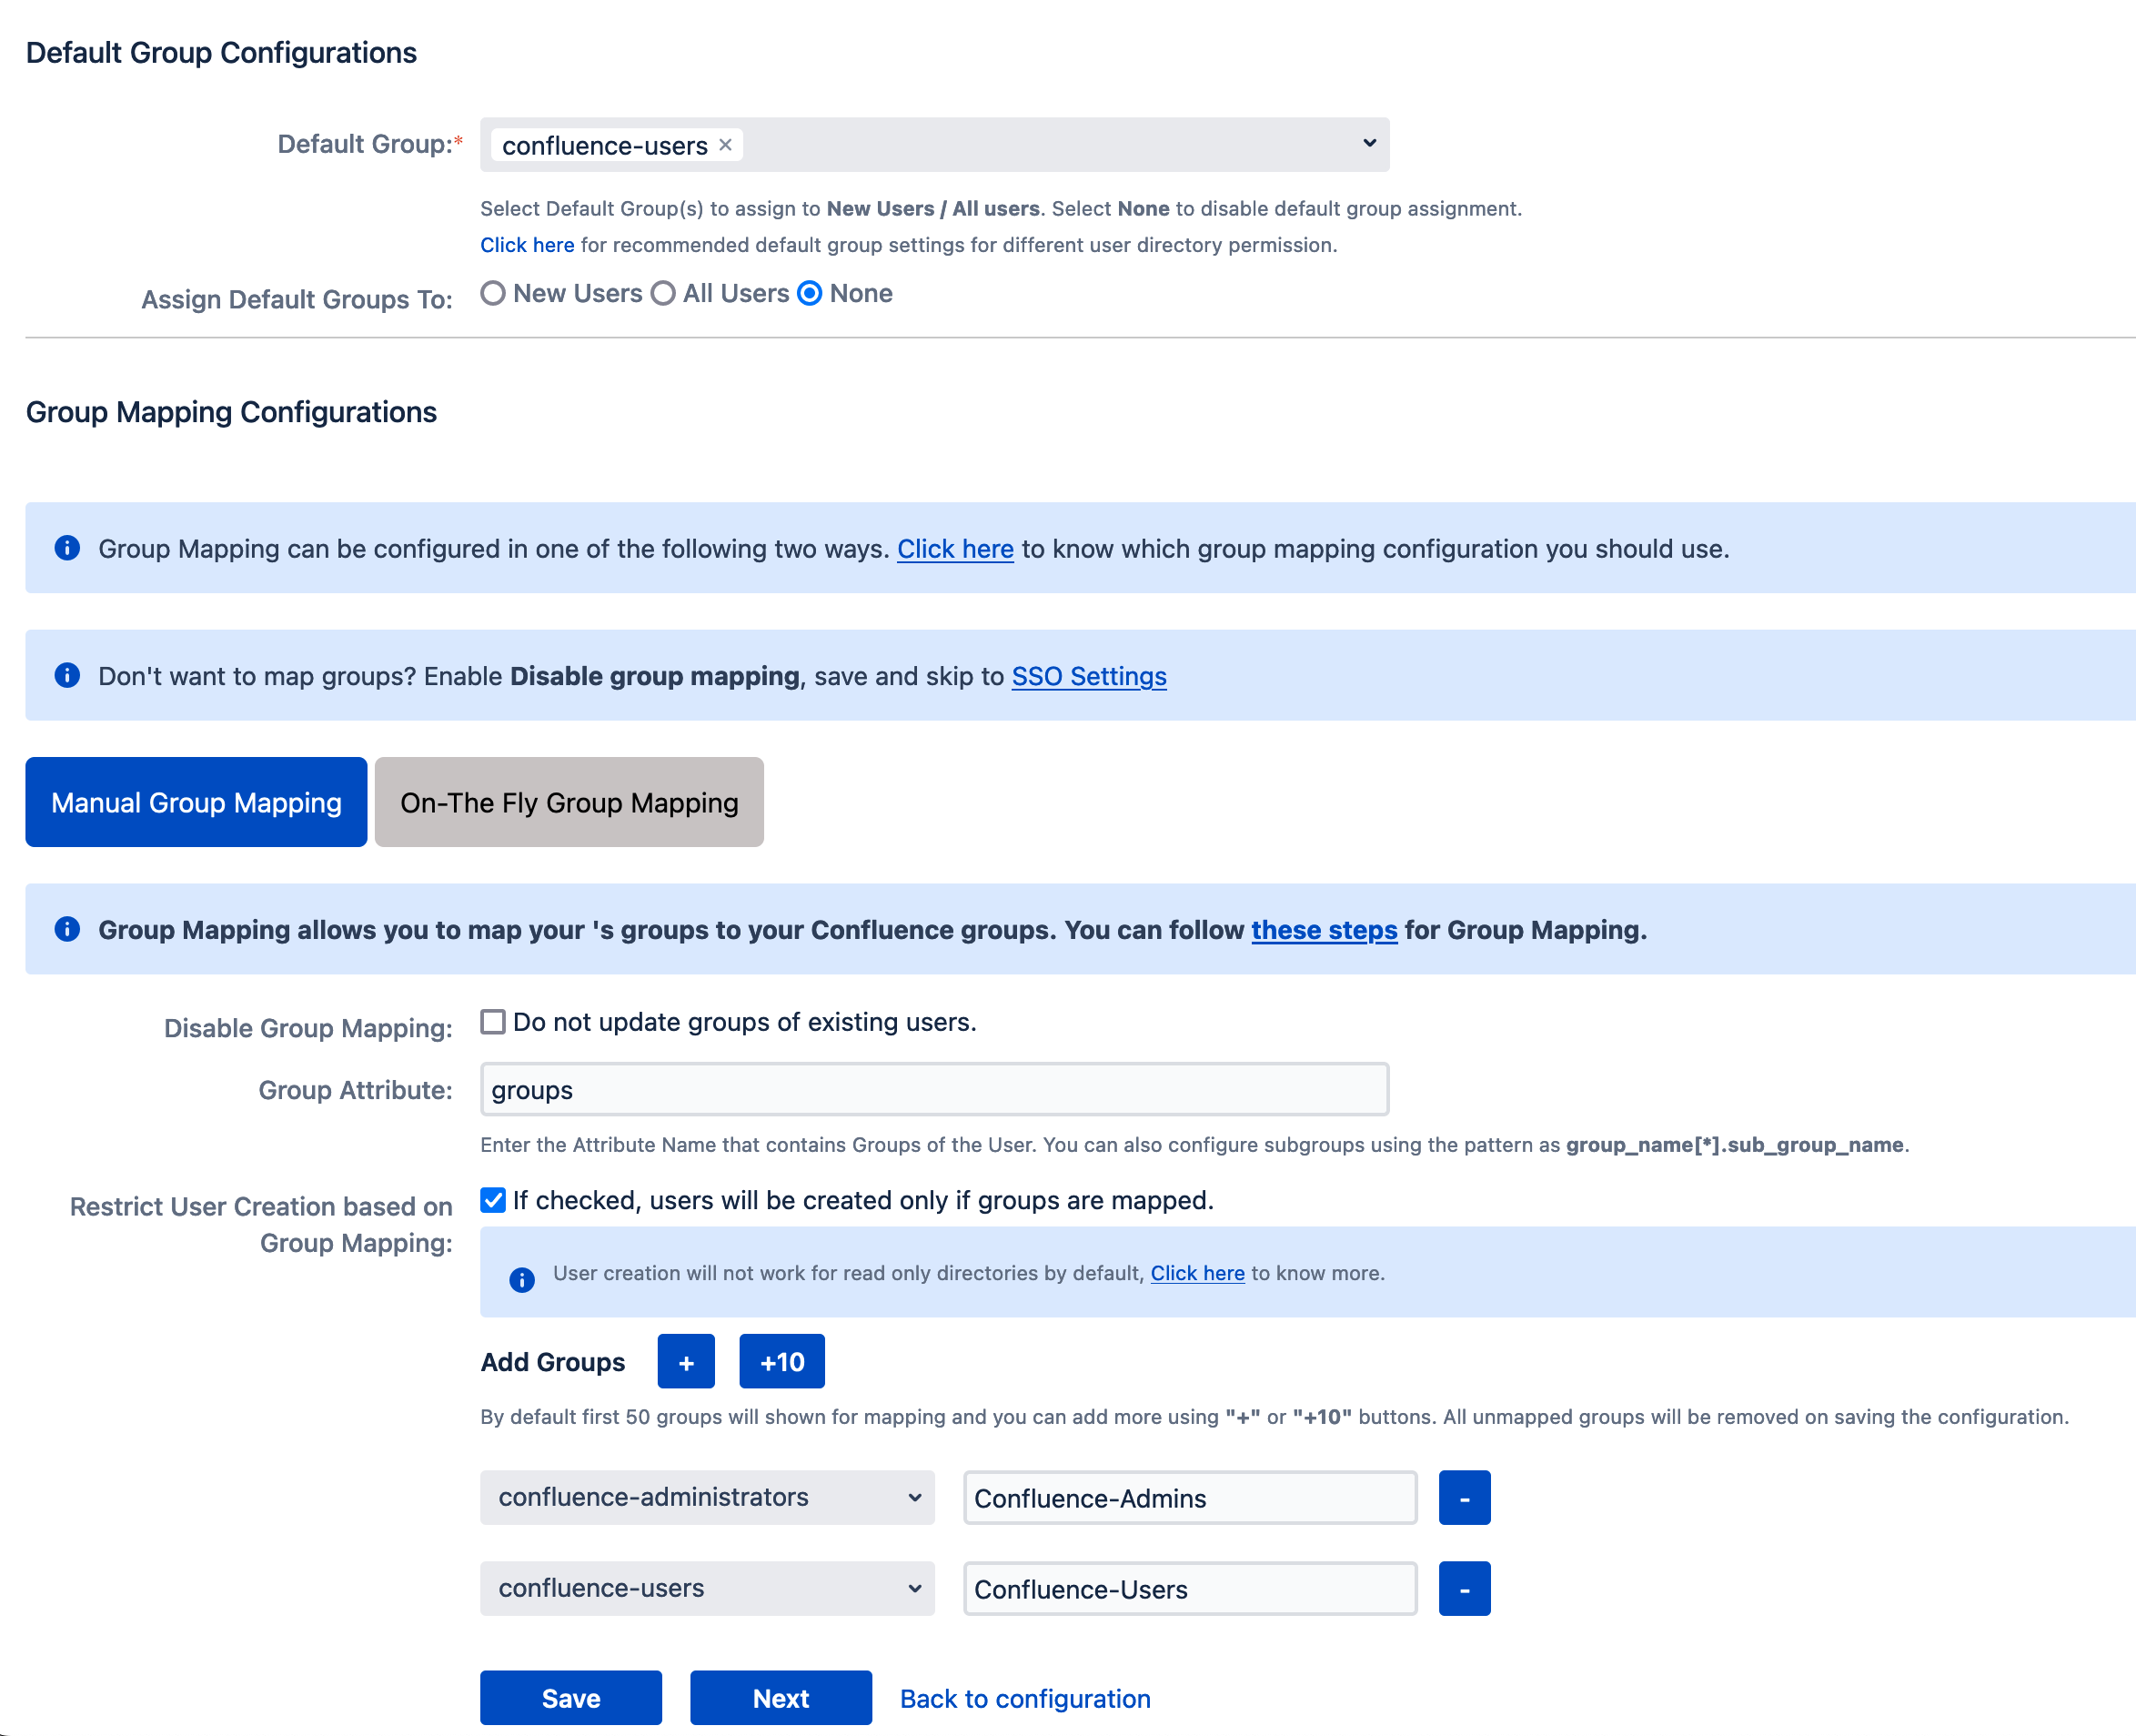
- Navigate to the User Groups tab.
- Set Assign Default Group To to None.
- Enable Manual Group Mapping and configure as per your needs (see examples below).
Sign-In Settings
- Navigate to the Sign-In Settings tab.
- Set the "login button text" to something descriptive (e.g., Company SSO).
- Click Save.